Drilling Work (Installing Trellis Systems)
After purchasing a climbing aid from FassadenGrün, the first step of assembly is marking drilling points and then drilling. Please always follow the instructions for drilling-- *especially* for adhering plants such as wisteria, rose, clematis, or other to the facade. Here you will find tips and rules (like how to make the cleanest possible drill holes), but the list does not claim to be exhaustive. It is only a complement to the respective product sheets and is a reference for lay and handymen who rarely do such mounting. For some types of walls- like concrete and plastered masonry- there are special instructions.
Each drilled hole represents a risky interference into an existing structure. Inform yourself about the type and nature of your wall.
Make sure that the area of your drilling has NO electric cables, pipelines and such, which are often inside the masonry. Be extra careful with the 'flush' lines which are also laid inside the outer house walls sometimes.
Even drilling in areas of window lintels, ceilings/floor slabs, ring beams and the like, can be problematic, depending on the wall type; it is usually best to avoid those areas altogether.
If possible, do not drill holes in border regions of free-standing walls made of brick or natural stone (that is: not less than about 25 cm from the wall edge), as cracks and spalling may occur under later loads. Also, mounting near fragile areas like the wall coping or wall edges should be done without 'expansion plugs' (i.e. without drilling and rawl plugs), but rather by bonding with composite mortar.
Due to the sealant/weatherstripping, use only composite mortar for all horizontal mounting points (for wire rope bases in concrete boards, etc..)
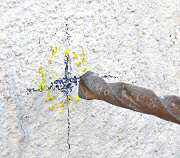
Mark each drill point with a little cross (photo).
In poor lighting, use a second, differently colored pencil to clearly mark the drill points (photo).
For marking, use pencils, crayons, oil pastels, etc.. whose marks can be completely removed. You can mark an inconspicuous spot as a sample.
Mark ALL points before you start drilling. This allows you to make corrections if necessary.
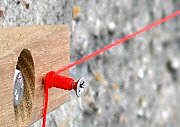
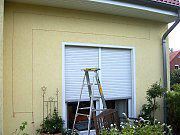
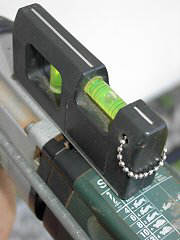
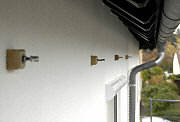
Use a mason's line, level, or laser for calibrating the drilling points vertically and horizontally, especially for long and high distances and where there are several drill points in succession (photos).
If the harmonious arrangement of the cable trellis on a representative facade plays a particularly important role for you, it is best to do the following: select all drill points on the wall and firmly mark them with your pencil; then take some pictures. Print these out, sketch all rope lines according to the visible drilling points; compare the result with your plan, and discuss it with your client or contractor, if necessary, before you start drilling. It is also possible to create an immediate virtual version of the climbing aid by means of small, hammered-in nails and stretched mason's line (photo).
Holes > 8 mm must be pre-drilled with a smaller drill bit (8 mm).
For large drill diameters and on hard surfaces (see above), a hammer drill is needed instead of a percussion drill.
Make sure that the shafts of your drill bit and the chuck of the drill match, so that the drill bit is secure in the chuck.
Use new, sharp drill bits. Bits that are already in use are often worn out, can slip and vibrate during drilling and may not drill to the correct diameter.
When working at heights, secure the surrrounding area in case a tool or other object is dropped.
Work with protective goggles and hair protection (helmet, cap or headscarf). Hair caught in a drill bit hurts!
Determine the necessary hole depth according to the rawl plug (usually plug length plus about 1 cm) and adjust the drilling depth, if possible, via a drill stop.
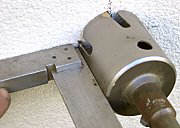
Work in pairs when you can, such that one person drills and the other checks the position of the machine from the top and from the side -- possibly using a spirit level and a square (an angle tool) -- to avoid drilling sideways.
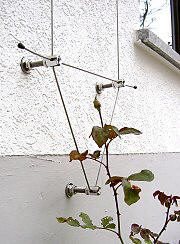
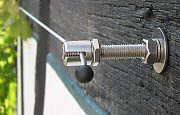
Long wall mounts with free-standing shafts are subject to elastic deformation due to loads in the direction of the rope force, approximately in the range of 0 to 2 mm. For this reason, drill the holes for end mounts at a slight angle, inclined opposite to the tensile stress-- so up to 2-5 degrees from the normal line-- so that the element can 'brace' itself better against the load, and the visual impression remains correct. If set too obliquely (if the angle of the inclination is too great), the function of the support discs cannot be guaranteed. It is not necessary to set at an angle for intermediate mounts.
For this reason, drill holes for end brackets for cables should be set at a slight angle, inclined backwards to the tensile stress, i.e. at a maximum of approx. 2 - 5 degrees from the normal line, so that the element can "brace" itself better against the load and the visual impression remains correct. If the angle of inclination is too great, the function of the supporting discs may no longer be guaranteed. It is not necessary to set at an angle for intermediate supports.
By pre-drilling holes with a smaller diameter, you may be able to first 'explore' the subsurface and then better seal a rogue (misguided) hole, due to its smaller diameter. The closure of 'rogue' holes is done with a suitable putty/filler or mortar for exterior use.
- To prevent spalling (cracking of the wall), drilling (approx. 1 cm) should always be done without the percussion/hammering mechanism, but can be switched on if necessary after the first centimetre.
Follow the course of your drilling, especially the uniform penetration of the drill (in other words, observe whether the drill bit passes through the wall at an even speed). If there are any irregularities or the speed should change, stop the work and investigate the cause (you can use a torch to look into the hole). It could be an unexpected joint or hollow body (cavity) for which the use of certain rawl plugs is no longer possible. If the drill bit hits stone (recognizable by agitated drilling noises, the 'running away' of the drill, and the color of the drill (stone) dust), a chemical seal/mortar will have to be used. Likewise, cavities, old wooden plugs (dowels), or plaster spots should also be treated/filled.
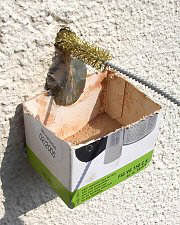
Catch or vacuum the drilling dust during drilling (again, helpful here to work in pairs). This will help you avoid the ugly dust streaks which can be difficult to remove. One solution, especially if working alone, is to attach a small cup or box just below the drill hole to catch the dust, using sculpting clay to secure it (it's called a "Naumann's box" by painters). Otherwise, brush away the dust when finished.
Before inserting rawl plugs, drill holes should be brushed, blown out, and when possible, vacuumed out. If you don't already have such equipment for cleaning drill holes, you can purchase them in our online shop.
For wall mounts with support washers, a sufficiently large, flat supporting surface (around the drilling point) must be available. This can be achieved on any surface by grinding/sanding down with coarse sandpaper.
'Bad' (incorrectly drilled) holes can be sealed with conventional sealants and putty (mortar) for exterior use-- available in all hardware stores. The appearance of the sealed hole becomes unnoticeable by sprinkling some of the (collected) drilled dust over the putty.

