Product sheet
Description / Price
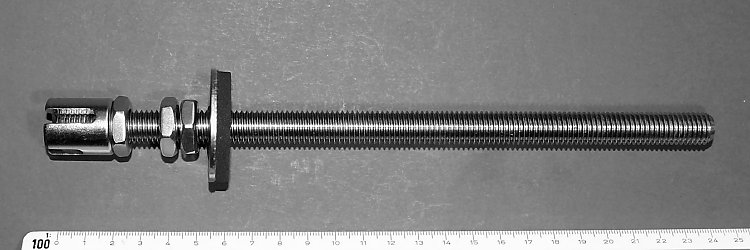
Cable holder or "cross holder" with a larger cover plate than the similar anchor WM 12XX2. Made of stainless steel, M 12 threaded shaft, available in various lengths. Cross head d=20 mm with grub screw, lock nut, double flat nut, polished cover plate d = 40 mm and gasket seal ring made of weatherproof foam. Thermal bridge effect reduction by fixing with composite mortar, anchoring without expansion pressure as no expanding dowel is used. The head is also available separately. >>>Price.
Usage
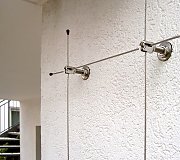
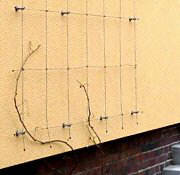
A low-cost option for mounting a cable trellis on ETICS insulation panels in conjunction with a modeled support cone. Can be used for panels up to 122 cm in thickness. For 3 and 4 mm wire rope. Alternative anchor for trellises in our "Heavy" version. Holds one rope or two crossed ropes. For all types of masonry. Light to medium load capacity. Recommended wall distance 3 cm, maximum 5 cm.
Different lengths available: the 3rd and 4th digits of the article code indicate the shaft length in cm. The calculation table already takes into account approx. 1 cm additional length for the reinforced external plaster and the adhesive layer of the ETICS insulation panel. Please only use the "Masonry with plaster" column if the thermal insulation was mounted onto an old building with another plaster layer under the insulation panel. Please note the article number you require and enter it in the "Notes" field while checking out.
Available lengths
wall distance | No wall plaster (new buildings) | With wall plaster underneath (old buildings) |
|---|---|---|
5 cm (6 cm panels) | WM 12224 | WM 12244 |
3 cm (8 cm panels) | WM 12224 | WM 12244 |
5 cm (8 cm panels) | WM 12244 | WM 12264 |
3 cm (10 cm panels) | WM 12244 | WM 12264 |
5 cm (10 cm panels) | WM 12264 | WM 12284 |
3 cm (12 cm panels) | WM 12264 | WM 12284 |
5 cm (12 cm panels) | WM 12284 | WM 12304 |
Please note: A greater wall distance reduces the risk of mildew for some climbing plants but the the load capacity of the holders decreases proportionally due to the buckling stress. Use only 3 mm cable for grater wall distances.
Recommended tools
Hammer drill HB 16310 or percussion drill SB 16400.
Assembly
Read the information sheet on drilling work and the instructions for the composite mortar. The wall surface should be reasonably level or prepared (sanded down) for optimum sealing. Drill with16 mm bit to leave enough space for the composite mortar as to reduce heat transfer(interruption of direct contact between metal anchor and wall, reduction of thermal bridge). Drilling depth in the masonry should be approx. 10 - 13 cm depending on the desired wall distance. In hollow masonry you should also use the extra long SD 16130 screen plugs and drill a 140 mm deep hole. The back of the insulation panel is milled with the drill and the residue blown out. The diameter of the circular cone
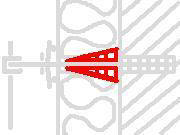
at the bottom of the panel should be about 80 % the thickness of the panel (i.e. at 10 cm insulation about 8-9 cm in diameter). Caution: The front area of the bore should not increase significantly in width, otherwise the sealing gasket will not be large enough. If possible, use drills with a smaller diameter, e.g. 8 - 10 mm to mill the panel. Cool the composite mortar in a refrigerator or in cold water to extend the curing time! Fill the drilling hole in the masonry as well as the milled cavity in the panelwith mortar to approx. 2/3 - 3/4 with composite mortar.
Push all movable parts of the rope holder towards the head of the shaft, insert the shaft into the composite mortar while rotating it . Position the shaft as to let the desired length stick out of the panel. Wipe off any mortar that swells out and, if necessary, secure the shaft from below against sagging while the mortar is drying.
The displaced mortar should now fill the rest of the cavity. If the drilling hole is too large at the surface of the insulation panel, use the mortar as a filler to create a sufficiently large support for the seal. Sand down excess after the mortar is dry. Once dry, the mortar forms a solid supporting cone inside the panel for maximum stability of the shaft. Push the cover plate together with the seal ring onto the wall and gently screw tight the first of the two flat nuts until only a narrow visible joint between cover plate and wall is visible. This optimum condition is permanently fixed by bracing both flat nuts against each other with the aid of two open-end wrenches. Further assembly is carried out as described for the "Heavy" version.
Origin
"Made in Germany": head from Saxony, shaft from Saxony-Anhalt, hexagon nuts from the Asia.


