Installation of Easy Kits
What are "Easy Kits"? Please follow the link if you need general information. This page is about the installation of such kits or of self-assembled wire rope trellises with eyelet screws. The information here should be considered in connection with the 10 - 25 installation diagrams of the corresponding cable system. Please use the link and go to the cable system you have purchased. The pictures shown here supplement the diagrams there and apply also to the Medium Kits (so long as they contain eyelets and no cross mounts). Before ordering, please check to see if you need tools!
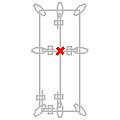
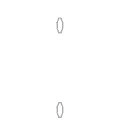
Grey ellipses (in the diagram) represent eyelet screws, show their alignment and indicate their corresponding force distribution. After drilling, clean all holes with a hole brush and/or blower. Then screw in the eyelets (usually by means of a screwdriver inserted through the eyelet). Add thimbles (as needed) to the eyelets that will hold wire rope loops later. Close the thimbles by pressing them together with pliers (photo). *Thimbles can be used but are not absolutely necessary and are not included in the kits.

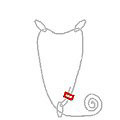
Variations are possible for the mounting of each kit; the mounting as described here (and pictured in diagrams) aims to minimise the number of times cables have to be cut and are designed to function without the use of turnbuckles. The cable is first passed through most or all of the eyelets in the order shown in the diagram. A double bend (kink) of the cable, leaving a 15 cm overhand, is usually sufficient to form the first wire rope loop.
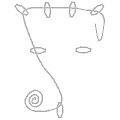

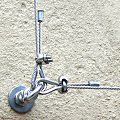
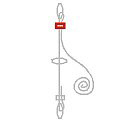
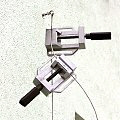
Proceed with the next steps at the eyelet you first threaded through. The end of the not-yet-fastened wire rope is grasped with a mounting vice and pulled taut by hand (approx. 5 kg force). A second vice is used to fix the two wire ropes close behind the eyelet (photo) so that applying the grip is easier (graphic). After tightening the grips/clamps, detach the vices and, with a wire rope cutter, cut the wire rope behind the grip, leaving about a 10 cm overhang.
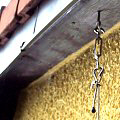
If the cable system includes a turnbuckle (for example with a ground anchor or when installing long ropes in the roof area), the installation of one of the two cable loops takes place at one end of the turnbuckle. The other end of the turnbuckle is then mounted directly to the eye bolt or hooked in (SP 05160 / SP 08280) to a ground anchor. A turnbuckle put in at ground level is easily accessible for re-tensioning, while a turnbuckle set near the roof protects against vandalism and manipulation.

Any additional rope sections shown in the diagrams will be laid according to the principle shown above. At places where ropes intersect, floating cross clamps are placed. Finally, all projecting ends of the wire ropes get protective end sleeves/caps (photo). With a protrusion of about 10 cm beyond the loops, as indicated, they can be easily grasped and re-tightened in later years as needed.