History
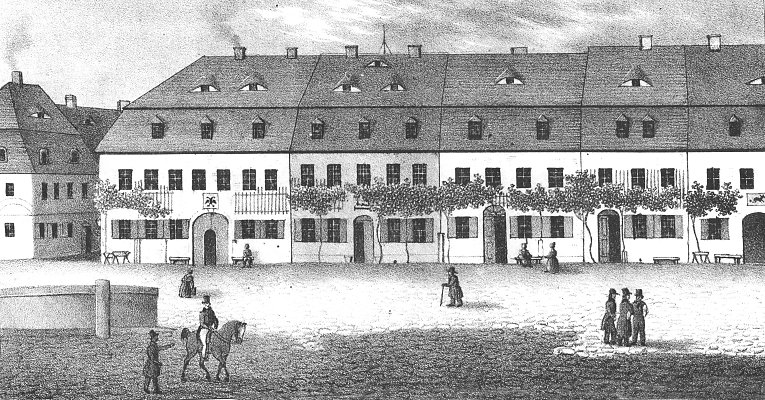
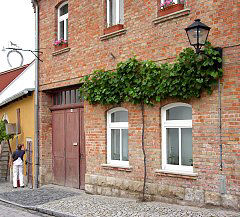
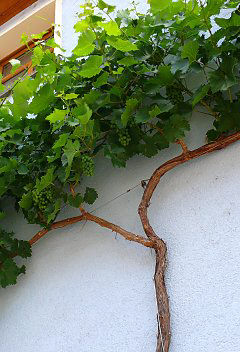
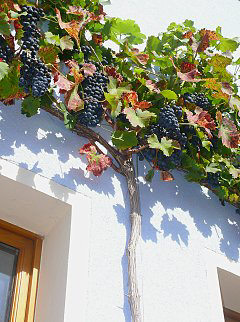
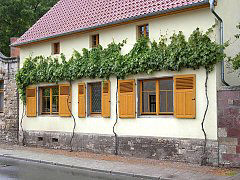
This cordon method was passed down as "Thomery-Cordon" from its French village namesake near Fontainebleau / Paris. Exceptional table grapes were grown in this way from quality (Gutedel/Chasselas) grapevines. The photos shown here were taken mostly in the east German region of Saale-Unstrut.
Spatial Requirements
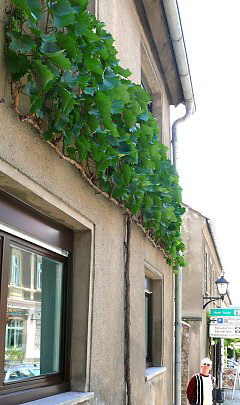
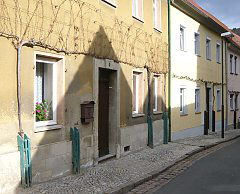
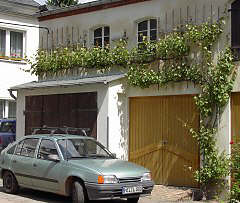
For a Thomery cordon, you will need a horizontal strip 70 to 120 cm high. For thinner, higher bands of greenery, refer to our section on garlands. The optimal length for a cordon arm is 1.2 m, or 2.4 m for a bilateral cordon (T-shape), perhaps longer with today's vigorous grapevine varieties. If the field to cover is very wide, you'll want to plant several vines. For good sap distribution in the T-shape, the two arms should be of equal length. The trellis should be at least 0.5 metres from the ground, but heights of 5-6 m are also possible.
Trellising
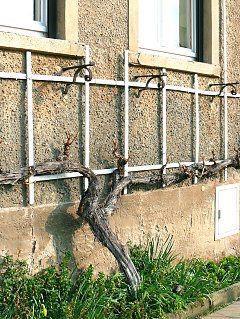
Wire rope systems and wooden espaliers are both fitting here. As a rule, a single vertical wire rope to guide the vine upwards with 2 - 4 horizontal wire ropes (spaced 25 - 35 cm apart) is sufficient. The arms are tied to the lowest wire rope, from where the shoots then grow each year into several new tiers, one above the other, and interlock with their tendrils. If not all the shoots hook on themselves, they can be tucked behind the wires or tied.
Training and Pruning
For the training procedure, refer to the illustrations below. On the horizontal arms (cordons), branches are developed at intervals of 15-20 cm. If these branches are developed *only* on the upper part of a single side (via buds every 2 to 4 eyes - 'cordon cut'), the whole arm will be more productive, robust, and longer-living, since the flow of sap will only be slowed down in the upper half of the arm. The canes later undergo pruning, usually spur pruning or, if some fail,rod pruning; for some special varieties and for very high yields- also cane pruning. If necessary, additional summer pruning.
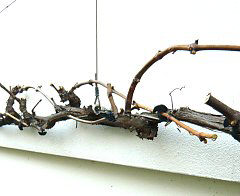


Cordons before spur pruning, historic illustration: Each tier is made up of a separate vine -- this is a particularly reliable and secure variation, which prevents the lower areas from becoming bare.
Spur pruned cordon, on 3 wire ropes similar to cable system 1060
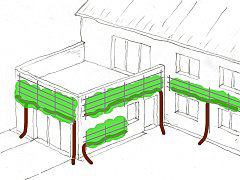
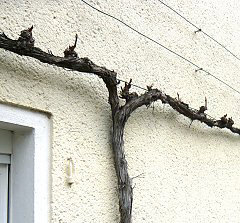
Espalier band with bilateral and unilateral cordons. For more photos, go to winter pruning.
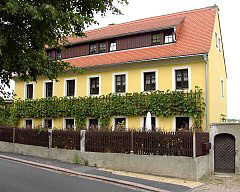
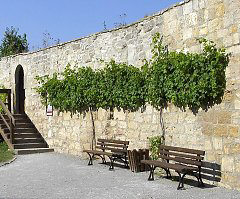
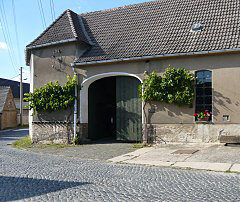


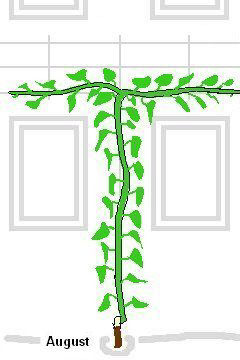
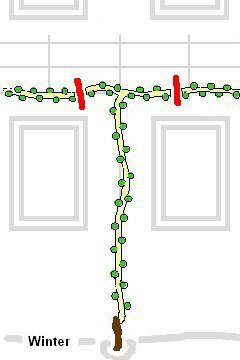
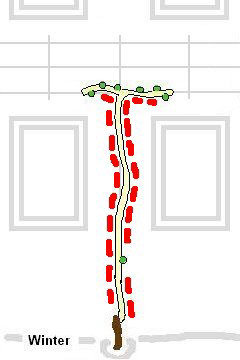
Diagram 05: In contrast to a vertical cordon, only every 2nd bud is used here (if eyes are spaced very closely, every 4th bud is used); all others are rubbed off. In cold regions, one bud on the lower part of the main trunk can be kept as a back-up or replacement spur, in case of severe frost damage.
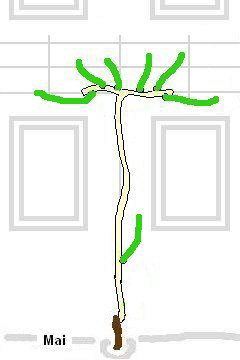
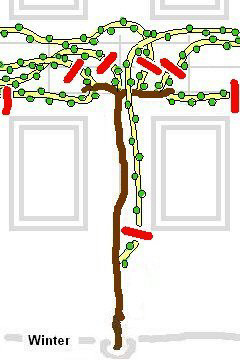
Diagram 07: The shoots coming from the previous years' buds are pruned to spurs just like the replacement spur will be. Depending on the growth of the vine, the cordon extensions are trimmed back to 3 - 5 new upper buds. Leave a distance of 15 to 20 cm between the already formed spurs and between the buds. If the cordons are to be extended further, then leave one lower bud at the end of each cane, as per Diagram 04/05.
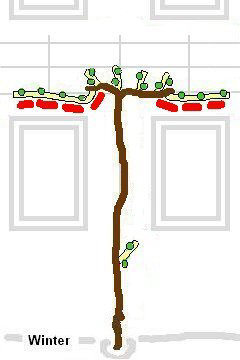
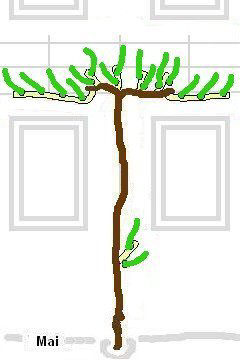
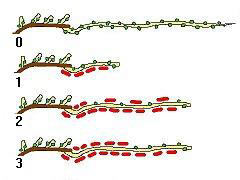
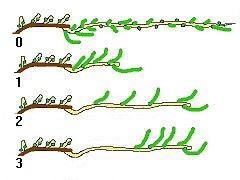
Diagram 10: Different possibilities for extending a cordon by pruning or thinning: 0 = unpruned, 1 = with closely spaced buds on the extension, 2 = with loosely spaced buds, 3 = with offset densely arranged buds. The cordons should be extended by max. 0.8 m (Variation 1) each year, or 3 - 5 new branches respectively. If the extension is to reach areas much further away in a short time, then it can be 2 - 3 m long; however, in this case, only 4 - 5 upper, suitably spaced buds (Variation 2) or buds in a suitable position (Variation 3) are to be kept. If required, a "lower" bud is to be kept again at the end of the shoot for another extension.

Diagram 11: After bud-break
Variation 1: for cordon extensions which are to be high-yielding and spur pruned
Variation 2: for cordon extensions which are cane pruned and for garlands, for which rapid lengthening and sparser foliage is desired.
Variation 3: for bridging unvegetated gaps / to guide cordons around house corners.