Product Sheet
Description / Price
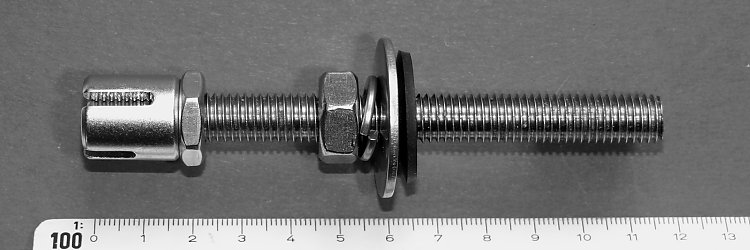
Cable (cross) mount made of stainless steel, shaft M10, crosshead d=18 mm, grub screw (set screw), lock nut, adjusting nut, spring washer, and washer. The mount can be delivered disassembled if necessary; the head is also available separately. >>> Price
Application
Inexpensive wall spacer/mount compatible with many wall types, particularly for protection/ privacy walls made of concrete or in edge areas where expansion pressure-free anchoring is required. For 3 mm wire rope, for medium kits in accordance with the specifications of the respective cable system (if purchased as pre-assembled kit), often in conjunction with WM 10100. Simple or crosswise cable guidance. The distance from mount to mount should preferably not exceed 1.5 m. Wall distance approx. 4 -5 cm. Close the drill hole and protect against water penetration. Please refer to the information provided on cable (cross) mounts for support in choosing a suitable trellis fitting.
Recommended Tools
The hammer drill set HB 44444 or the single hammer drill HB 12160 are suitable for bonding; alternatively, the concrete drill cassette SB 77777 or the masonry drill cassette SB 44444 are suitable for impact drilling. For high demands, the universal drill cassette UB 77777 is available.
Mounting
If needed, please refer to our instruction manual on drilling. Drill a hole with a diameter of 12 mm, approx. 60 mm deep; brush and blow out the hole for better adhesion of the mortar. Press in composite mortar (quantity or number of strokes determined as you go) and no later than 2-3 minutes later, insert the shaft by turning (insertion depth greater than 5 cm, i.e. approx 5.3 cm) so that the longer part of the shaft is in the hole and there is no overweight at the front. Press the shaft slightly against the lower wall of the borehole so that it already rests against the lower wall of the borehole and any "sagging" during the setting process is avoided. Wipe off any excess mortar. Approx. 4 - 5 min. after filling in the mortar, when the setting/drying begins and the grub screws (threaded bolt) no longer shift/slip, wipe the area around the bolt again to obtain a flat surface. Make sure the hole is completely filled with mortar and that it is sealed. Remove any mortar from the protruding thread. After setting (see cartridge), slide on the washer, spring (lock) washer and nut, put against the wall, and tighten. Gasket then isn't required. Then put on the thin/flat nut (only a few millimeters) and the crosshead...align the grooves vertically-- e.g. with cross head and flat nut lock against each other (using a screwdriver to hold them crosswise through one of the grooves). Further assembly is carried out as described for medium kits.
Special Features
Conditionally suitable for solid wood > 5 cm (hardwood for timber framing or wood formwork with counter lathing). For assembly: drilling diameter 8-9 mm, grease the threaded shaft, screw in directly and then tighten the washer. In special cases, the mount is available with a longer shaft at no extra cost-- 120 mm (currently not available) and 150 mm as WM 10151. A bolt set (nut, spring washer and flat washer) for through hole (push-through) mounting into wood posts, etc. is also available.
Source
Production: "Made in Germany" (Saxony); hexagon nuts from the Far East.
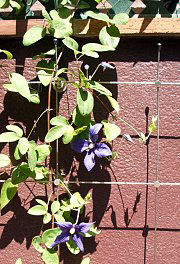
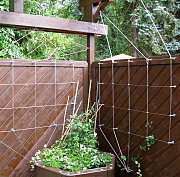
Cable system 5050 with clematis, WM 10101 in the sensitive margin area of the wall coping

